FIVE TYPICAL CAMERA SETTING ERRORS
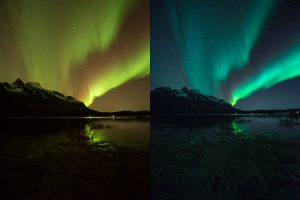 Learning how to use a camera properly is the most important aspect of improving a photographer’s skills. Composition, lighting and post-processing on a computer have a big impact on the quality of the photo, but still they are second on the list of priority skills. The main thing is the camera.
Five common camera setup errors
A professional photographer, Ugo Cei, spoke about one elegant trick he uses to teach his clients how to study the camera better: take a brown paper bag, put the camera in it, and blindly, without looking at it, adjust the ISO, shutter speed and aperture to the desired values. If you can do this, then you already know your tool enough and can move on (it goes without saying that you also need to clearly understand how these basic settings work).
Making mistakes is part of the learning process, and the sooner you come across them, the better. Let’s look at some of the most common mistakes in camera settings and see how to fix them.
1 error: use auto camera mode
Naturally, the use of automatic camera mode will not add you a better understanding of its basic settings. This mode is great if your only goal is to take home pictures of your family vacation. But if you are serious about developing your photography skills, please do not use it!
Automatic mode is a mode in which the camera itself selects all the settings. The problem is that this mode does not allow you to get a very high-quality image. The camera selects settings that provide optimal exposure (i.e., the image is not too bright and not too dark). It seems to sound good, but the problem is that the camera does not take into account factors such as noise / grain and depth of field. Here the camera will try to choose such a shutter speed value, i.e. a shutter speed that is fast enough to avoid camera shake.
Further, the aperture and ISO are adjusted depending on how fast the shutter speed should be. If shooting in a darkened environment, the automation will most likely select an open aperture and increase ISO. Although this will not be the optimal setting. Try to do it all better by hand, so that you know exactly how these settings will affect the final image.
2 error: use an excessively high ISO value
Another common mistake is to use an excessively high ISO value. An ISO number controls the sensitivity of your camera’s sensor to the amount of light. The higher the ISO value, the higher the photosensitivity and the more noise you have in the photo, so in most situations, you should keep the ISO as low as possible. Increasing this setting allows you to use a shorter shutter speed, but at the same time will lead to noise in the image. This is fine if you need a quick shutter speed, but you should be aware of the consequences.
Try to keep your ISO at 100 as much as possible. In situations where you are not using a tripod, start adjusting the ISO only when it becomes noticeably darker or when the shutter speed is too slow to get a sharp enough “handheld” picture. Then gradually increase the ISO until you return to such an exposure time that is fast enough (as a rule, you should not take it “with your hands” at a shutter speed slower than 1 / focal length of the lens).
In situations where you are forced (or prefer) to use slow shutter speed, mount the camera on a tripod and continue to use the “native” ISO camera, which for most cameras is 100.
3 error: use too slow shutter speed
This leads us to a third often-made mistake: using exposure time that is too long for handheld photography.
Although image stabilization systems are getting better and better every year, and some camera models are capable of supporting shutter speeds of up to one second for hand-held photography, but this is not exactly what users usually have in photo bags.
Five common camera setup errors
Despite using a 14 mm lens, the shutter speed of 1/20 second was too slow and resulted in a less sharp image
You won’t be able to get a very clear picture when taking pictures “with your hands” at a slow shutter speed, and the minimum shutter speed depends on which lens you are using. Again, photographers use the “1 / focal length” formula when photographing “handheld”, that is, no slower than 1/50 second by 50 mm or 1/20 second by 20 mm.
However, even when using a shutter speed of 1/20 second and a 20 mm lens, some camera shake may occur. When previewing, make sure the image comes out crisp.
