9 INTERESTING TECHNIQUES FOR ARCHITECTURAL PHOTOGRAPHY
 The correct implementation of the technical part of architectural photography should be the primary task of the photographer, although in addition to this, it is also worth experimenting.
In this article, photographer Simon Bond shares some of the options for creative architectural photography and talks about how you can apply them to your work.
9 interesting techniques for architectural photography
A wide angle lens was used in this photograph of a Tokyo government building from a lower angle (“worm’s eye”)
Change of angle
Many architectural photographs were taken at the eye level of the photographer – in other words, at street level or elevation at the level of the building itself, if available. However, this is far from the only way of architectural photography. Using extreme angles, such as a worm or a bird’s eye, can bring you truly impressive results.
The worm’s gaze is probably the easiest angle for the photographer to work best when shooting tall buildings. You can use it to highlight interesting details of the ceiling or photograph skyscrapers from the base of the building. If you find yourself surrounded by tall buildings located close to each other, shooting from this angle helps fill the sky.
Bird’s-eye view – in order to get such a shooting angle, you first need to find a way to rise above the photographed building. And with the advent of photography using the drone, it has become much easier. No drone? No problems. In the end, you can always find another tall building to take pictures from its roof or upper floors. And you may be lucky – to fly, for example, in a balloon!
Infrared photography
You can change the nature of your creative architectural photography without resorting to changing the shooting angle. One of the best ways to do this is to try infrared photography. She will change the image and turn it into a fabulous landscape. This style of photography works much better on the street and in places where there is some vegetation. Through some post-processing, you will create an image in which the photosynthetic plants are white and the sky turns dark.
Architecture forms a powerful focal point in infrared photography. You have three main options for doing this style of shooting. You can convert your camera, use an infrared filter, or simply achieve an effect with further post-processing.
9 interesting techniques for architectural photography
Infrared photography is a great experiment technique
Light painting
One of the most creative photography techniques is light photography. The trick is to know when and how to apply it to photography, because not all architecture will blend in well with it. Maybe there is no way to access the part of the structure in which you would like to use it? Or, perhaps, light painting will distract the viewer’s attention too much from the buildings themselves. If you can use it to form the main line in architecture or, possibly, to frame it, you will be on the right track.
The following light sources are suitable for this technique:
The flashlight is the easiest. It can be used to create drawings in front of the camera or, perhaps, to illuminate the desired part of the architecture;
light source on the tape – repeating patterns (patterns) work well in architectural photography, and just the rotation of the light source on the tape can help with this. You can also use it to create a light orbit and specifically place it in front of your building – the subject;
LED sticks – in recent years, products such as pixelstick and magilight have revolutionized this technique – and these are really great tools for architectural photography.
9 interesting techniques for architectural photography
In this photo, a pixel around the pagoda was used for the light.
Kinetic lighting
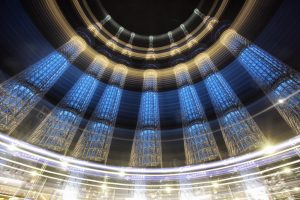
The sister of light painting is kinetic light painting. A tripod is also required for such a technique, but this time you will be moving the camera itself, not the light source. Once again, this is more of an experimental technique, and not all locations go well with this style of photography.
The two main types of kinetic light imaging are flash burst shooting and camera rotation.
Zoom burst – the technique works well with tall buildings, at a distance, and in the event that they are lit by many internal building lights. You need to mount the camera on a tripod and use a zoom lens. A whale lens, or perhaps 24-70 mm, is very suitable for this. You start shooting from a larger focal length, and then zoom out.
Camera rotation – rotate the camera around the tripod head. This works well with tall buildings when you take a worm-eye view.

